Overview
Here are the steps to show search results on a branded SharePoint 2013 site using only standard web parts and the web user interface. Since best practice is to use an out-of-the-box master page master page for the system pages, the default search results would not be branded.
Steps
Creating the Page
If you already have a search box built into you branded page, you can skip adding the search box in steps 5 and 9.
- Create a new page: Site Actions widget > Add a page > SearchResults (or whatever)
- Optional: add
&k=keyword
or
?k=keyword
to the URL of the page where keyword is a search term that returns results for your site where keyword is a term that will return results. This will show real-time results as you craft the page. For example,
http://SharePointSite/Pages/Results.aspx?k=keyword
- Set the page's title to Search Results
- Insert a table with 2 columns and 1 row.
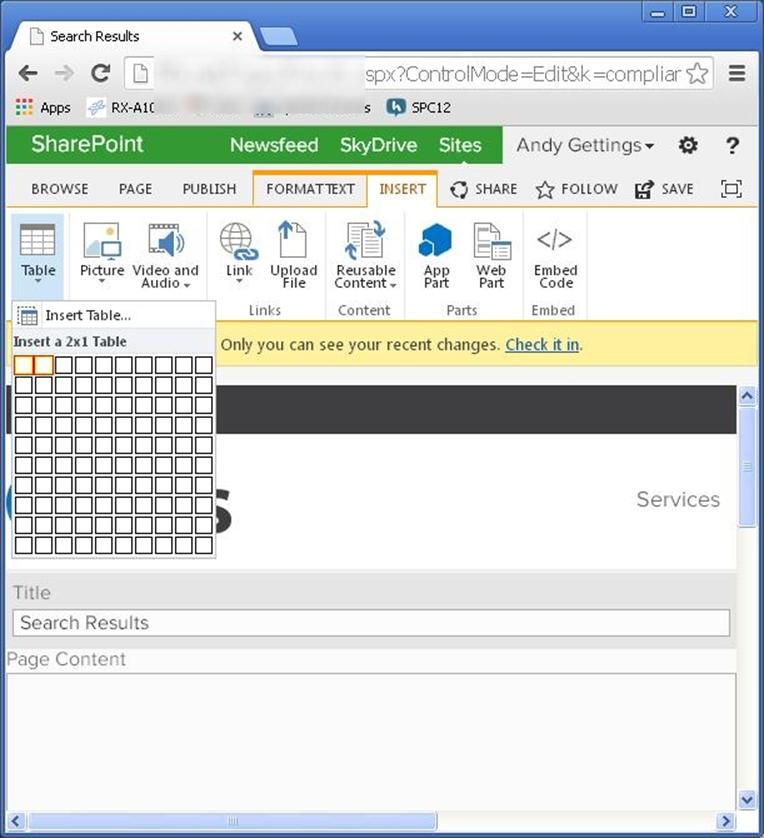
- Put the cursor in the right column and split vertically.
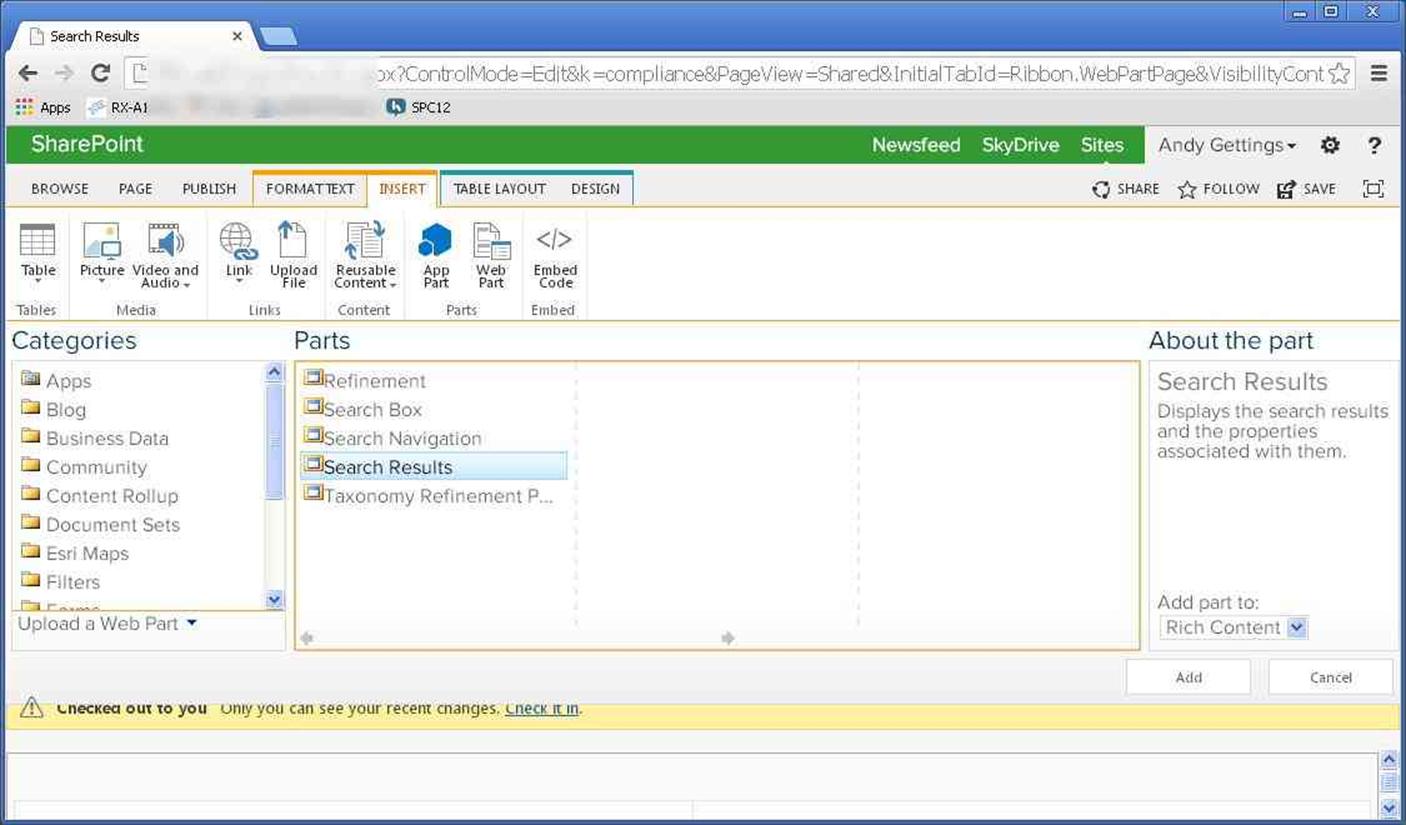
- Click into the lower right cell and insert a Search Results web part: Ribbon – Insert – Web Part > Categories - Search > Parts – Search Results.
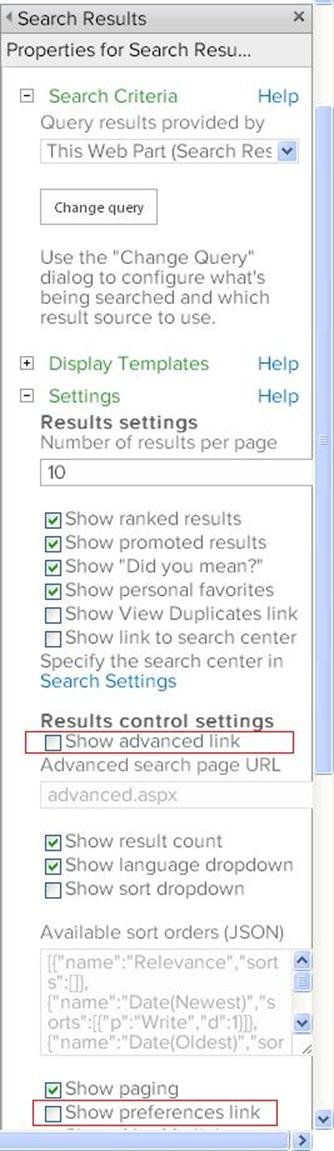
- Remove Preferences and Advanced Search links by editing the Search Results web part.
Alternatively, you can make a branded advanced search page.
- Click in the left column and insert a Refinement web part from the same category as Search Results.
-
Set search results page via Site Actions widget > Site Settings and then click on one of the Search Settings links
- Site Collection Search Administration – Search Settings - if you are not at the root site collection, this is not available. Setting the page here will set the search results page for sub sites, and usually is what you want.
- Search – Search Settings – if you have unbranded non-anonymous subsites, you will probably want to use this option so that the other sites keep the standard look and feel.
There is a little more detail about this below in "Wire up the Search Box to the New Search Results".
- Click in the upper right cell and add a Search Box from the same category.
- If desired, hide the Search Results page from navigation.
- At this point, the page should work, but the padding and width can use some tweaking.
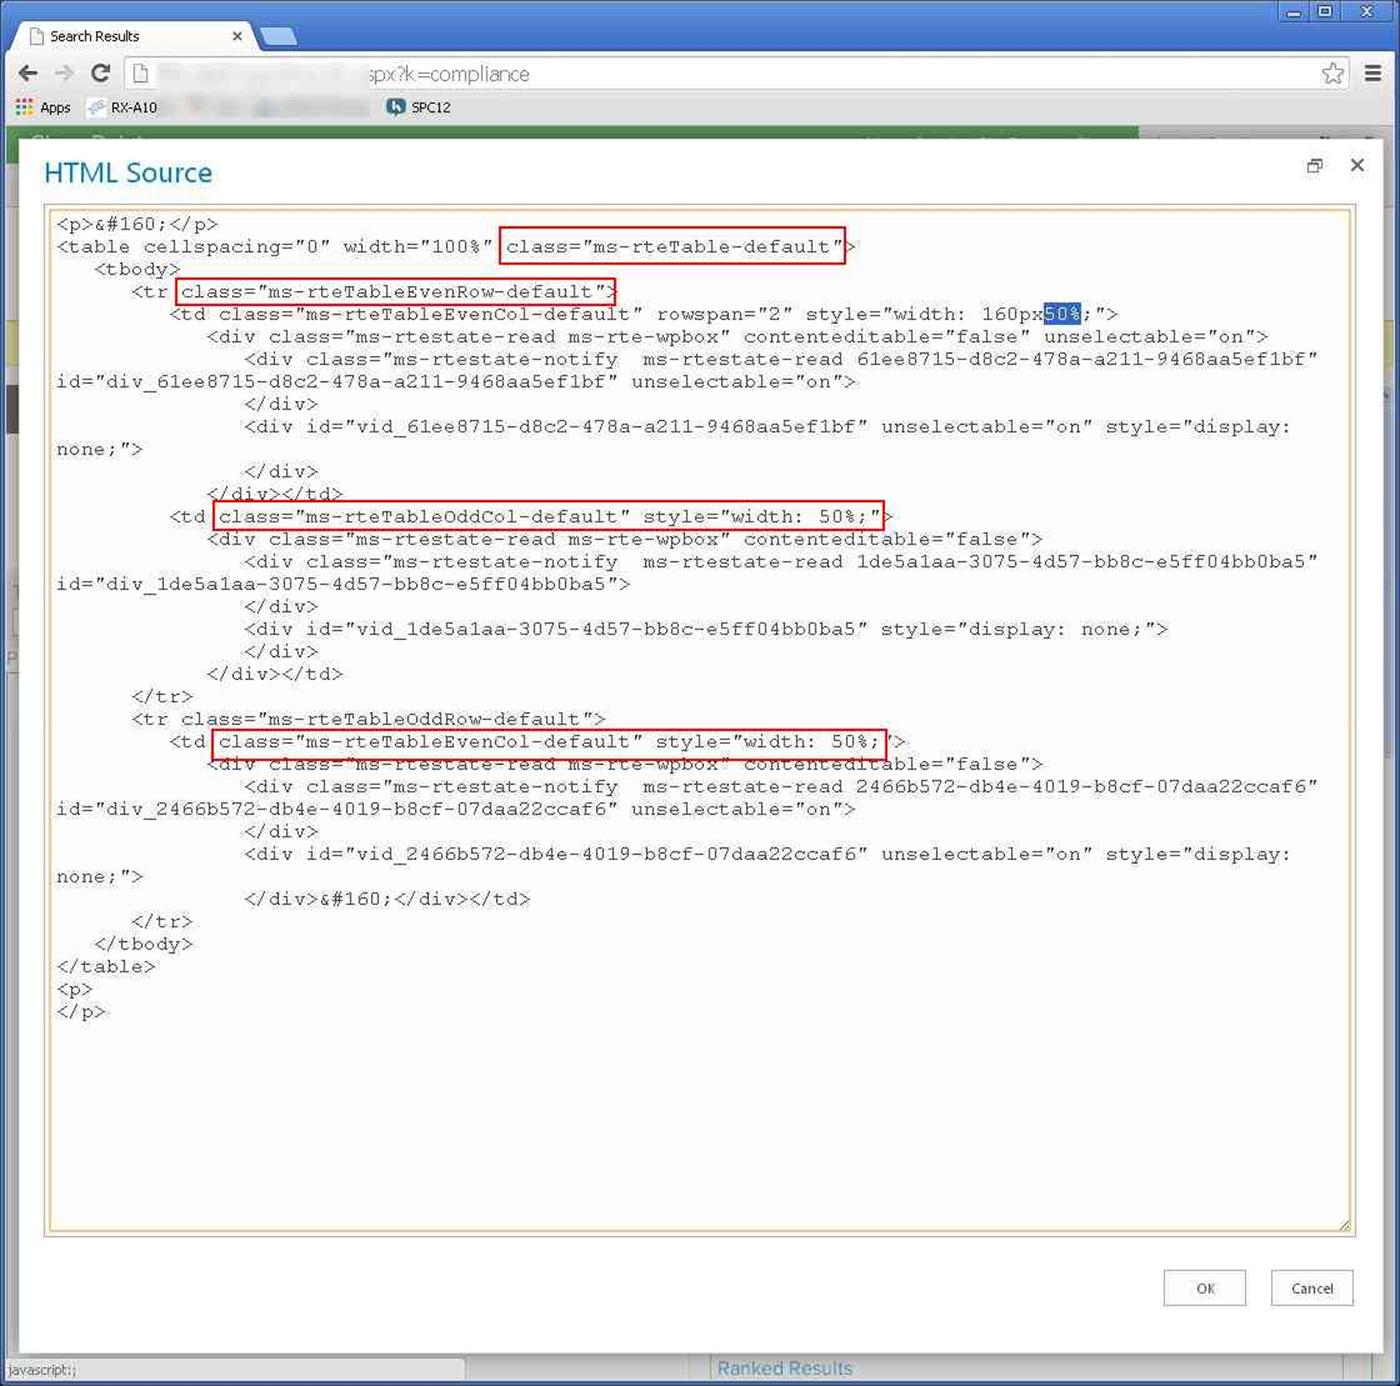
Edit the page via ribbon – Format Text – Edit Source.
Then change the style of the first TD tag to
<td style="padding: 20px; width: 160px;">
and remove all the class="ms-rte…" from the table, tr and td tags, and remove the width: 50%; styles
Wire up the Search Box to the New Search Results
Here are two options for using the new search results page from the search box. Usually, you will want all subsites' search results to be branded by default, but they do not have to be.
Branding all subsites search results
- At the root of the site collection, use Site Actions widget > Site Collection Administration – Search Settings.
- Clear the "Use the same results page settings as my parent" check box.
- Enter the relative URL for in the "Results page URL:" box, e.g., /pages/results.aspx
- Save
You can override the search results page for a subsite.
Branding just the root site or a subsite
- Navigate to the desired site or to the root site.
- Use Site Actions widget > Search – Search Settings
- Clear the "Use the same results page settings as my parent" check box.
- Enter the relative URL for in the "Results page URL:" box, e.g., /pages/results.aspx
- Save